
It wasn’t a difficult decision to remove Miss Trilly’s air conditioner. We always do our land traveling in the winter when the weather is not hot. What we truly appreciate having is the propane heater for those icy, high desert nights. So, off with her head! (BTW: the Coleman MiniMach is in working order, so we have stored it in the garage, just in case.)
We found that the saddle support is slightly sagged and crooked. The roof beneath is also a bit slumped and lopsided. The slope collects water like a pond. In order to seal the trailer roof against the ponding, we stuck down a piece of translucent fiberglass with silicone. It flattens out the top of the saddle so water cannot collect.
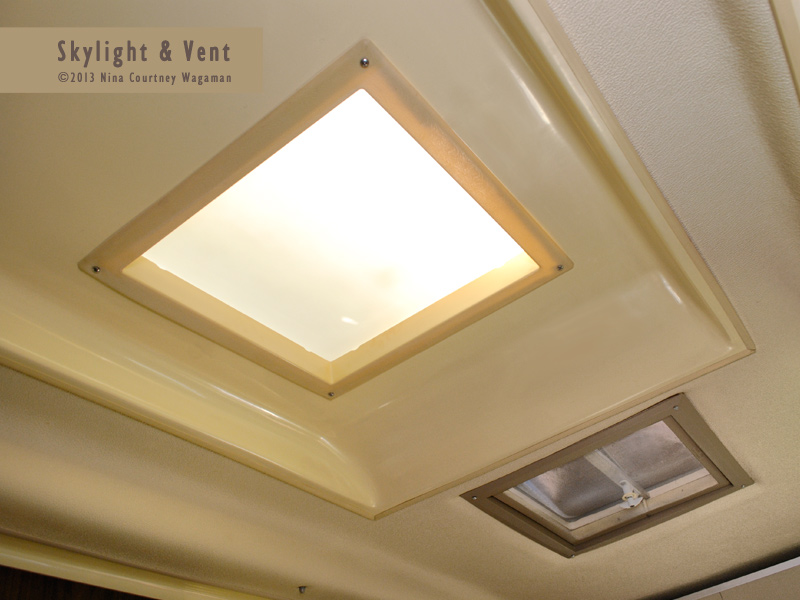
Roughly cut openings go through both the saddle and the AC indent in the roof. We found an old square-cornered vent “garnish” at a RV used parts store. The sides were extra tall and had to be cut down. The brittle, yellowed plastic (a nearly perfect match to the ceiling gelcoat, actually) cleaned up well. The flange dimension just barely covered the jagged opening in the ceiling where the AC came through. After cutting small half-circle vents in the sides of the trim to allow for expansion, we glued a piece of white plexiglass to top of the frame. We now had a skylight! Clark attached standoffs to hold up the center of the saddle’s fiberglass sheet as extra insurance for proper drainage, then we screwed the new skylight in place. It allows a very pleasant light into the interior.
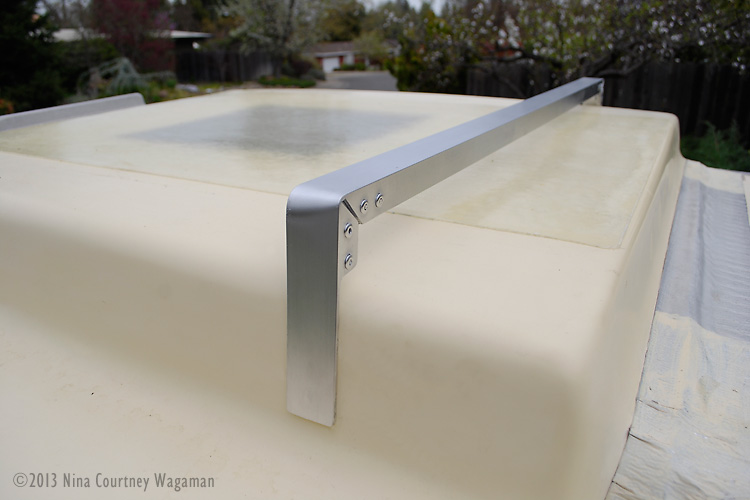
Clark built brackets for the 100-watt Grape Solar panel we bought at Costco. He used aluminum angle, cut and bent to fit the saddle. The corners are pop-riveted. The solar panel will be mounted with enough space beneath to clean and reach wiring.
The roof itself has a few problems. A previous owner had applied heavy butyl roofing tape along the edges of the saddle support for the AC, probably to stop water infiltration. You can see some of it in the photograph. We think water was likely coming through a crack around one of bolts in the top of the AC housing. We couldn’t face removing the heavy tape and repairing the entire area on this go-around.
This tape is also applied all around the original vent, so we opted to seal the cracks in its plastic base instead of replacing it. Clark sprayed on three coats of clear Rust-Oleum Leak Seal, which seems to have done the job. I cleaned and covered the underside of the aluminum lid with the same automobile carpeting we used in the closet. After Clark used his new plastic welding kit to repair and fill in the cracks in the trim, he painted it with the same color as the light fixtures.
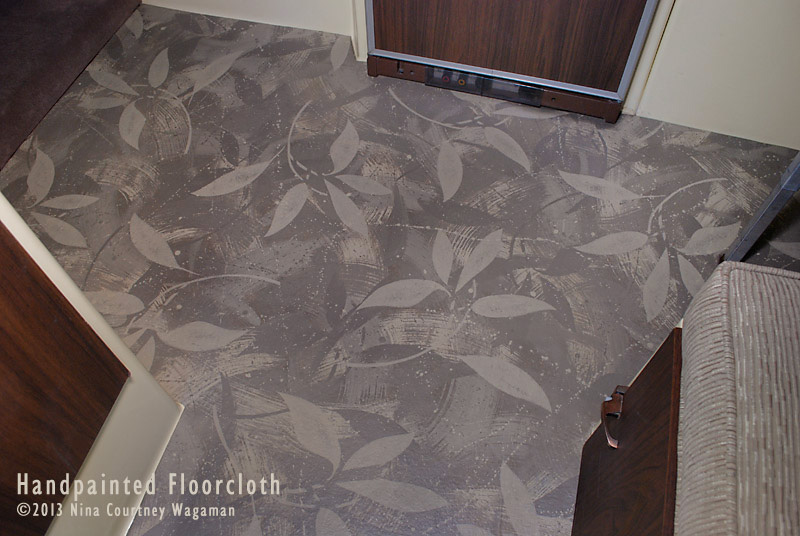
Here is the floorcloth in place. I glued heavy felt on the back, then folded under a 2.5″ hem to cover the edges of the felt, mitering the corners. It is glued with spray adhesive. There was enough left of the painted canvas to make two placemats, which I backed with the same rubber sheet we used under Miss Trilly on her trailer frame.
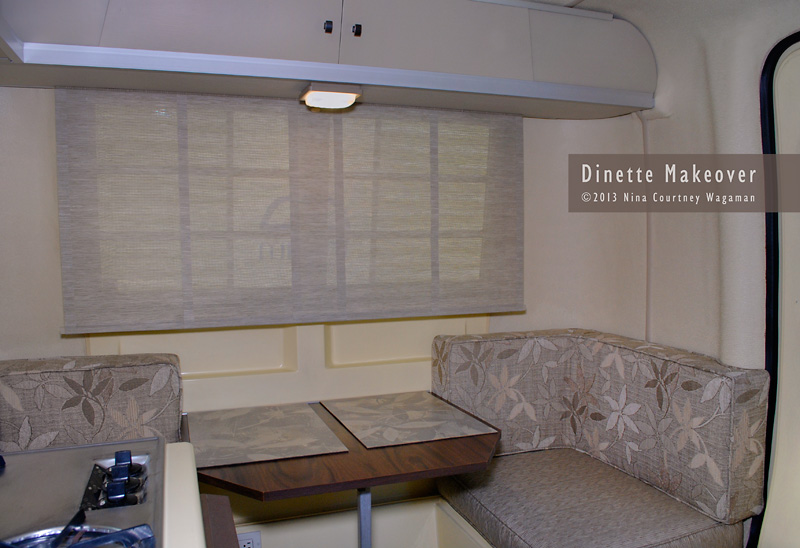
The front dinette is all put together in this photograph. At some point, perhaps, we will change the dark fake wood throughout to a lighter and more rugged material. I have already selected a plastic laminate that would work well with the new colors.
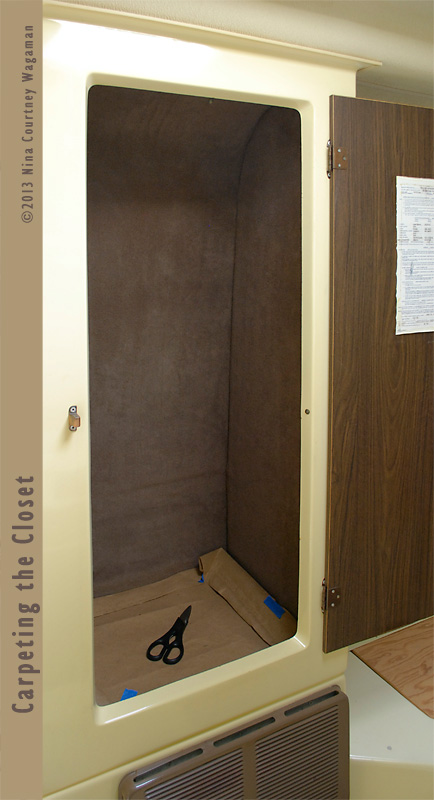
I used the old “rat fur” to cut a new lining for the closet out of the automobile carpeting. It is glued with latex carpet adhesive (that was tricky!), which I think is still off-gassing. The paper lying at the bottom is a pattern for the lightweight plywood floor. I also covered that with the carpeting. We painted the wood supports for the shelves with a matching color.
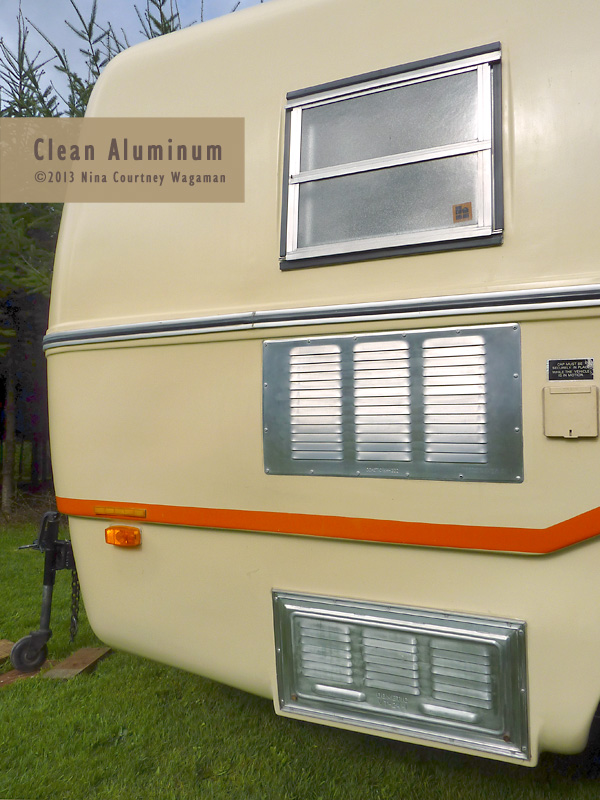
I have stated how much I disliked cleaning the aluminum windows. I must say that getting the paint off the two grills on the port side was extremely unpleasant. After scraping with fingernails and a stick of bamboo so as not to scratch the aluminum, I tried buffing with a nylon abrasive “ball” mounted on a drill. This worked to polish the bare aluminum but did nothing to remove old paint. Steel wool didn’t work either. It had to be scraped–very, very tediously. The lower grill had some paint that I was unable to scrape off. It seemed baked on. Finally, with some reluctance, I bought paint remover. After these grills were finished, I moved around to take off the old paint on the drip cap over the doorway. It was a bit easier to do. Now the metals all look so much better! Satisfaction with a job done well.
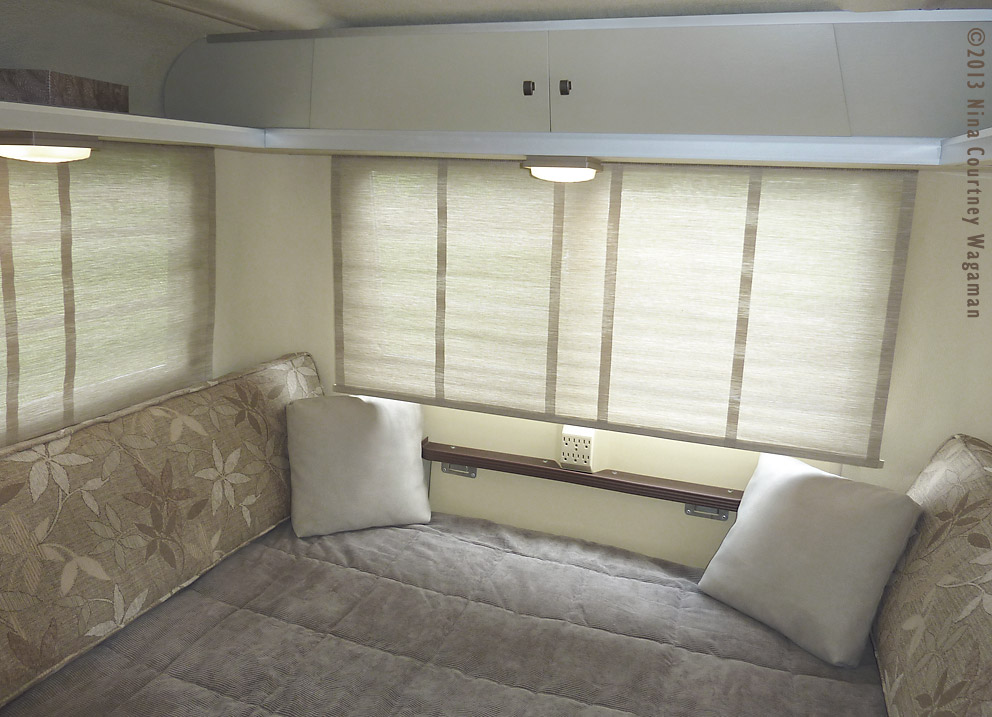
Here is another look at the bed area. I am unable to adequately express how much we are looking forward to taking Miss Trilly on the road in the Fall of 2013. We are going to enjoy her immensely! We are very satisfied with the results of the work we have done so far. We have taken very good care of her and we know she will take very good care of us for many years of traveling together.
Perhaps we will see you out there! Look for us, won’t you?
Happy Travels,
9ah & Clark

Hi- we have a 1978 4500 Trillium- “Buttecup”- we are in the process of painting the plastic lam cabinets. Some of the hinges have phillips head screws and others have a square head. We bought 00 but to small and the 0 was too big. Did you remove your cabinets doors to paint? Do you have the square head screws? If so do you know the size? Thank you, Khristy and Tom
Hi, Khristy & Tom
If we responded to you back in April, accept our apologies for our repeat reply to your question about the Trillium 4500 cabinet doors. Our hinges are pop riveted, not screwed in place. We did not paint the hinged doors, but did cover one drawer front with Sunbrella because the vinyl lam was peeling. Happy travels! 9ah & Clark
the higgins tent trailer is so cool for its time. there are very few left still complete. ussually wind up being leaf/garbage trailers.so sad. but i have one complete.what i am searching for is a new canvas top for it.until i punched in higgins i didnt think i stood a chance.so are there any options for tops available.
Greetings! Apologies for the delayed reply to your comment. We sewed a new roof of the same color canvas on our 1948 Higgins Camp Trailer, using the old fabric as a pattern. We also changed the door design & replaced the window screens. The canvas is heavy cotton, which chafes while towing. We’d like to make a new heavy gauge nylon pack cloth tent in the future. What did you decide to do with the canvas tent on your Higgins? Do you have photos? Happy travels, 9ah & Clark
Love what you have done. And I love the way you write!!
Love the tire cover you made—actually would like to make one for a spare tire I have–but need more detail—how did you get he tire cover so flat without sagging–is there card board or foam underneath the face? What type elastic did you use—do you have a photo? HELP—I eill be happy to post my email address or phone..Thank you
Hi, Peter
The vinyl fabric from which the tire cover is made was taken from the underside of the original Trillium cushions. It is fairly heavy, backed with cloth, but not difficult to stitch on a home sewing machine. I made a covered vinyl welt using bias strips cut from this fabric. This piping definitely helps hold the shape of the cover. Once this is sewn in place around the edge of the circle, then the perimeter fabric is attached. The structure then becomes quite substantial.
The cover is cinched around the tire with a nylon strap, which is run through the hem in the manner of a drawstring. Because the fabric is so thick, it is somewhat difficult to tighten and tie in place. The finished cover fits perhaps a bit too snugly, so we are happy that it does not need to be removed often. Next time, I may use a lighter weight outdoor fabric for the sides to make wrapping and drawing easier. As it is, we have no worries about the cover blowing off!
Let us know how your tire cover turns out, won’t you?
Happy travels,
9ah
Greetings. We just purchased our trillium 1300 a few months ago. I am beginning to work on her a bit. The first thing on my list of to di’s is replacing the wood frame of the jealousie Windows. Can someone please provide their thoughts on the type of wood to use and any insight that may help…. Thanks in advanced.
Hi, Joe
Welcome to the Vintage Trillium Troop! We used vertical grain fir for the wood around the windows, sheetmetal screws, with butyl tape as the seal between the window frame flanges & the exterior fiberglass. Gently peeling back the Ensolite, so as not to damage it, was the most difficult part. We installed painted wood frames around the windows on the inside for a finished appearance.
Happy refurbishing!
Clark & 9ah
Hi I love your site! For your large bed in the back, what is the mattress? It looks like part of the table cushions are on top of your bed???
Also, we are doing a big road trip soon… do you have any space saving tips and tricks? And Did you put a tv inside your Trillium? If so, where?
Hi, Caro
Thanks for your interest! Yes, the cushions you see are the back cushions for the seats when the bed is a table, though we leave the seat cushions at home. The bed is always made up and we use the cushions as back rests when lounging during the evening. The mattress came with the trailer when we bought it. It is some kind of foam—we believe it is not memory foam. The mattress is reversible, covered with fabric, and is very comfortable. We placed a closed cell foam pad under the mattress to keep condensation from forming and to provide additional insulation. We learned from living on our trimaran that condensation ruins fabric quickly. We use HyperVent on the boat—it has saved our upholstery.
As for space-saving tips, I cut down a fabric shoe holder to one row and attached it to the inside of the door. I used pieces of 3M Dual Lock Fastener on the door, which mates with Velcro (fuzzy side) glued onto the fabric. This avoids drilling holes and is removable. Another single row of the shoe holder is attached under the front dinette. It holds various chargers and a small inverter, plus whatever odds and ends one would like to keep off the floor. We used Closet Maid Cubeicals (collapsible storage boxes) under the bed for our clothes, three each. Six small Closet Maid Cubeicals fit perfectly on the overhead shelves without falling off during travel. We keep socks, underwear, other miscellaneous small items in these. No, we did not install a TV, preferring to listen to music on our iPod through vintage portable iHome H19 speakers and reading.
Happy road-tripping!
Clark & 9ah
Thanks for the fast reply!!
We have a front bunk, so we cannot make our back table into a permanent bed. Yours looks very comfy!
Thanks for the tips on where to store clothing and small things. I will try that out too.